
Creating custom clothing is one of the most popular ways to get started as a Roblox creator. But what if you're not a digital artist? Designing unique, high-quality textures from scratch can be difficult. This is where AI image generators can become an incredibly powerful tool in your creative workflow.
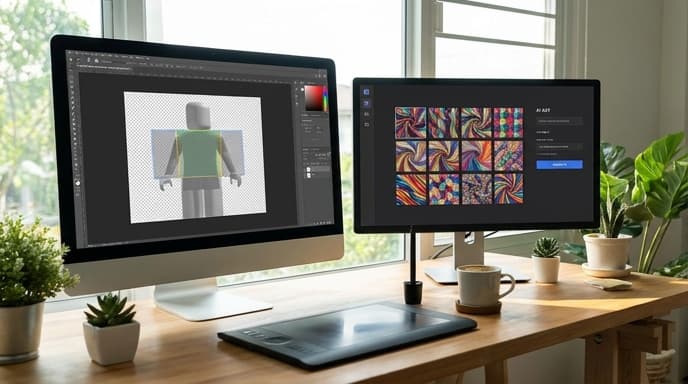
Instead of searching for pre-made textures, you can generate exactly what you need, from simple fabric patterns to complex sci-fi armor. This guide will walk you through the process of using AI to create textures and apply them to your Roblox clothing designs.
The Core Idea: Generating Seamless Textures
The key to a good clothing texture is that it can be repeated without obvious seams. When a texture is applied to a 3D model, it needs to wrap smoothly. The magic word for your AI prompt is 'seamless texture' or 'tileable pattern'.
An AI image generator works by taking your text description (a prompt) and creating an image from it. Your goal is to write a prompt that clearly describes the material you want, while also telling the AI to make it tileable.
How to Write an Effective Prompt
Crafting a good prompt is a skill. You need to be specific. Don't just ask for 'shirt texture'. Instead, build your prompt with layers of detail.
Here's a simple formula to follow:
[Style] + [Subject/Material] + [Key Descriptors] + [Magic Words]
- Style: (e.g., photorealistic, cartoon, anime, pixelated, cyberpunk)
- Subject/Material: (e.g., dragon scales, denim fabric, chainmail, circuit board)
- Descriptors: (e.g., dark blue, worn and faded, glowing neon green, intricate)
- Magic Words: (e.g., seamless texture, tileable pattern, 4k detail, flat design)
Example Prompts:
- 'Photorealistic dark blue denim fabric, worn and faded, seamless texture'
- 'Cyberpunk glowing neon green circuit board, intricate detail, tileable pattern'
- 'Cartoon dragon scales, bright orange and red, simple flat design, seamless pattern'
The Workflow: From Prompt to Product
Having a great texture is only the first step. Here's how to get it onto a piece of clothing.
- Generate Your Texture: Use your chosen AI image generator with your carefully crafted prompts. Generate a few variations until you find one you love.
- Download the Roblox Template: To create clothing, you need the official templates provided by Roblox. Search for 'Roblox clothing template' to find the latest versions for shirts and pants. They are simple image files that show how the texture will be mapped onto a character.
- Open an Image Editor: You'll need a program that works with layers, such as Adobe Photoshop, GIMP (a free alternative), or Photopea (a free web-based editor). Open the Roblox template file in your editor.
- Apply Your Texture: Import your AI-generated texture as a new layer. Position and scale the texture to cover the different parts of the template (torso, left arm, right arm, etc.). You can cut and paste pieces of your texture to fit each section of the template.
- Export and Upload: Once you've covered the template, save the final image as a PNG or JPG file. Then, go to the 'Create' section on the Roblox website, navigate to Shirts or Pants, and upload your file. There is typically a fee in Robux to upload an asset to the marketplace.
What AI Struggles With
While powerful, AI generators have limitations you should be aware of:
- Text and Logos: AI is notoriously bad at generating readable text or coherent logos. If you want a brand name or a specific symbol on your shirt, you'll need to add it yourself in your image editor.
- Perfect Symmetry: Getting perfectly symmetrical designs can be tricky. You may need to generate a texture and then mirror it manually in your editor.
- Complex Layouts: An AI can't design the entire shirt layout on the template for you. It's best used for generating the raw material—the fabric pattern—which you then assemble onto the template.
FAQ
Which AI image generator should I use?
There are many options available, each with different strengths. Some popular choices include Midjourney, Stable Diffusion, and DALL-E. Many have free trials or free tiers, so you can experiment to see which one's style you prefer.
Is it okay to use AI-generated assets on Roblox?
Policies around AI-generated content are still evolving. As of now, using AI to create textures for your own designs is generally acceptable, but it's crucial to read the terms of service for both the AI generator you're using (regarding commercial rights) and Roblox itself. Always be transparent about your process and ensure you have the right to use the images you create.
How do I make sure my texture is seamless?
After generating an image, you can test if it's seamless by tiling it in your image editor. Place four copies of the image together in a 2x2 grid. If you can't see the edges between them, you have a perfect seamless texture.
Key Takeaways
- Use AI image generators to create unique, custom textures for your Roblox clothing.
- Craft detailed prompts using keywords like 'seamless texture' and 'tileable pattern' for the best results.
- Generate the raw texture with AI, then use a standard image editor to apply it to the official Roblox clothing template.
- Be aware of AI's limitations, especially with text, logos, and perfect symmetry.
- Always check the terms of service for both your AI tool and Roblox regarding the use of generated assets.
Related Reading
- Roblox Scripting Basics: Make Your First Part Change Color
- Understanding Roblox Premium Payouts: How Your Game Can Earn Robux
- Creating and Selling Game Passes in Roblox Studio