
Opening Roblox Studio for the first time can feel overwhelming. There are windows, buttons, and menus everywhere. The best way to cut through the noise is to build something tangible. An 'obby'—short for obstacle course—is the classic first project for a reason. It teaches you the most important, fundamental skills you'll need for any future project.
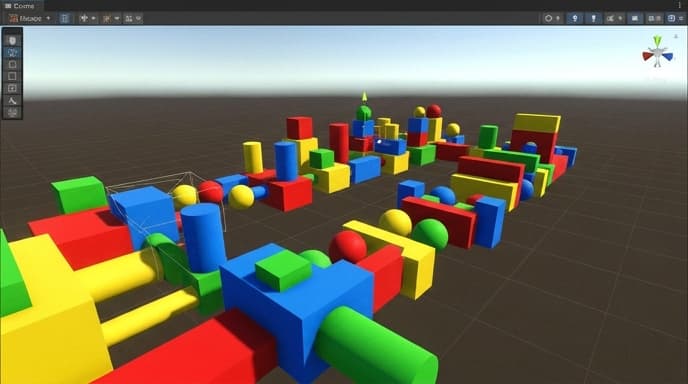
This guide will walk you through creating a single, simple obby stage. By the end, you'll have a starting platform, a series of jumps, a hazard that resets the player, and a finish line that saves their progress.
Step 1: Set Up Your Workspace and Starting Point
Open Roblox Studio and select the 'Baseplate' template. This gives you a clean, empty space to work.
First, we need a place for players to spawn. In the 'Model' tab at the top, you'll find an object called SpawnLocation. Click it to insert a spawn point into your game. Use the 'Move' tool (also in the 'Model' tab) to drag it up so it's floating slightly above the baseplate. This will be the start of your obby.
Select the SpawnLocation part, and in the 'Properties' window (usually on the right), find the 'Decal' property and uncheck it to remove the Roblox logo for a cleaner look. You can also change its color and material here.
Step 2: Create Your First Platforms
An obby is all about jumping between platforms. Let's create some.
- In the 'Home' tab, click the 'Part' button. A new brick will appear.
- Use the Scale tool to resize the part into a flat, wide platform.
- Use the Move tool to position it a short distance from your SpawnLocation. This is your first jump.
- With the part selected, go to the 'Home' or 'Model' tab and find the Anchor button. Click it. This is the most important step. Anchoring a part prevents it from falling or being moved by physics. If you don't anchor your platforms, your obby will fall apart as soon as you play it.
- Duplicate the platform by right-clicking it and selecting 'Duplicate' (or using Ctrl+D / Cmd+D). Move the new platform to create the next jump. Repeat this a few times to create a simple path.
Feel free to use the 'Rotate' tool and change the colors of your parts to make the course more interesting.
Step 3: Make a 'Kill Brick' Hazard
A good obby needs obstacles. A 'kill brick' is a part that resets a player's character back to the last checkpoint if they touch it. This requires a very simple script.
- Insert a new Part. Make it bright red so players know it's dangerous. Position it where a player might fall. Don't forget to Anchor it!
- In the 'Explorer' window (on the right), hover over the red part you just created, click the plus icon, and select 'Script'.
- Delete the default 'print("Hello world!")' text and replace it with the following code:
script.Parent.Touched:Connect(function(hit)
    local humanoid = hit.Parent:FindFirstChildWhichIsA("Humanoid")
    if humanoid then
        humanoid.Health = 0
    end
end)
This script listens for anything touching the part. If the thing that touched it has a 'Humanoid' (which all player characters do), it sets the character's health to 0, causing them to reset.
Step 4: Create a Checkpoint
If your obby is long, you need checkpoints. Otherwise, players have to start from the very beginning every time they fall. A checkpoint is just a special type of SpawnLocation.
- Insert a new SpawnLocation at the end of your jumping section. This will be your stage's finish line.
- Select this new SpawnLocation. In the 'Properties' window, find the property called TeamColor and change it to a different color from your starting spawn point.
- Find the AllowTeamChangeOnTouch property and make sure it is checked.
Now, when a player touches this platform, it becomes their new spawn point. If they fall on a later stage, they'll respawn here instead of at the beginning.
Step 5: Test Your Obby!
The final step is to play your creation. In the 'Home' tab, click the 'Play' button. Your character will spawn at the start. Try out the jumps, test if the red kill brick works, and see if you respawn at the checkpoint after touching it. Testing is a huge part of development, as it helps you find problems, like a jump that's too difficult or a part you forgot to anchor.
Frequently Asked Questions
Why do my parts fall when I start the game?
You forgot to anchor them. Select any part that is supposed to be stationary and click the 'Anchor' button in the toolbar. This is the most common mistake for beginners.
How can I make different kinds of obstacles?
You can create spinning platforms (using scripts or constraints), moving platforms, and disappearing blocks. These are great next steps after you've mastered the basics of static parts and kill bricks.
How do I save my game?
Go to 'File' > 'Publish to Roblox As...'. This will save your game to the Roblox cloud and allow you to make it public so other people can play it.
Key Takeaways
- Use the Part tool to create platforms and the Scale, Move, and Rotate tools to position them.
- Always Anchor any part that should not move due to gravity or player interaction.
- A SpawnLocation serves as a starting point or a checkpoint for players.
- You can make a part a hazard (a 'kill brick') by adding a simple script that sets a player's health to zero on touch.
- Use checkpoints (SpawnLocations with `AllowTeamChangeOnTouch` enabled) to save player progress through your course.
Related Reading
- Beat Builder's Block: How to Use an AI for Infinite Roblox Studio Ideas
- How to Use an AI to Debug Your First Roblox Lua Script
- A Player’s Guide to Spotting and Avoiding Robux Scams