
If you've ever wanted to create your own experiences in Roblox, learning to script is the most powerful skill you can have. It lets you bring your worlds to life with custom behaviors, from opening doors to creating complex game mechanics. But you have to start somewhere.
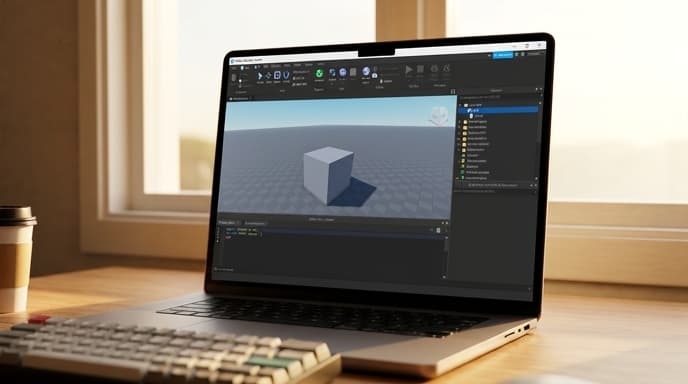
This guide is for the absolute beginner. We're going to do one simple thing: create a part that changes color all by itself. In the process, you'll learn the fundamental building blocks of scripting in Roblox Studio.
Step 1: Set Up Your Workspace in Roblox Studio
First, you'll need to have Roblox Studio installed. Open it up and create a new project using the 'Baseplate' template. This will give you a clean, empty space to work in.
Next, you need to create the part we're going to script.
- In the top menu, go to the HOME tab.
- In the 'Part' section, click the small square icon. A new gray part will appear in the middle of your workspace.
- Make sure the Explorer and Properties windows are visible. If not, go to the VIEW tab and click on 'Explorer' and 'Properties' to enable them. The Explorer shows you all the objects in your game, and Properties shows you the details of the selected object.
You can use the tools in the HOME tab to move, scale, or anchor the part, but for now, just leave it as is.
Step 2: Insert a Script into the Part
Now, we need to give our part a 'brain'. In Roblox, this is done by adding a Script object to it. The script will contain our code, and because it's inside the part, it will know which object it's supposed to control.
- In the Explorer window, find your 'Part'.
- Hover your mouse over the Part, and a small '+' circle icon will appear. Click it.
- A menu will pop up. Start typing 'Script' in the search box, and then click on Script to add it.
A new Script object will be added as a child of the Part, and the script editor window will open, showing a default line: `print("Hello world!")`. You can delete this.
Step 3: Write the Color-Changing Script
This is where we write our Lua code. Type or copy the following code exactly into the script editor window.
local part = script.Parentwhile true do part.BrickColor = BrickColor.Random() wait(1)end
It looks simple, but it's doing a lot. Let's break it down line by line:
local part = script.Parent: This creates a variable named 'part'. We tell it to refer to the parent of the script. Since our script is inside the Part,script.Parentis the Part itself. This is just a convenient shortcut.while true do: This starts a loop that will run forever. 'while true' is a condition that is always met, so the code inside this loop will repeat again and again.part.BrickColor = BrickColor.Random(): This is the core action. We are accessing the BrickColor property of our 'part' and setting it to a new, random color. Properties are the characteristics of an object, like its color, size, or transparency.wait(1): This is a very important line. It tells the script to pause for 1 second before continuing. Without this, the loop would run millions of times per second, changing the color so fast you wouldn't see it, and likely crashing the game.end: This simply marks the end of the 'while' loop.
Step 4: Test Your Creation!
Now for the fun part. To see your script in action, you need to run the game.
- Go to the TEST tab at the top of Roblox Studio.
- Click the Play button.
Your game will start, and you will see your character spawn on the baseplate. Look at your part—it should now be changing to a new random color every second. To stop the test, click the red Stop button in the TEST tab.
FAQ
Why did we use `script.Parent`?
script.Parent is a robust way to refer to the object a script is inside. It means if you rename your Part to 'BlinkingBlock', the script will still work without any changes because it just looks for its direct parent, whatever it's named.
What other properties can I change?
Almost anything you see in the Properties window can be changed by a script. Try changing `part.Transparency = 0.5` to make it semi-transparent, or `part.Anchored = false` to make it fall.
What does 'local' mean in the first line?
`local` declares the variable within the scope of this script only. It's good practice in Lua programming to use `local` for your variables unless you have a specific reason to make them global.
Key Takeaways
- Objects in Roblox, like Parts, have Properties (e.g., BrickColor, Transparency) that can be changed with scripts.
- You add behavior to an object by inserting a Script into it in the Explorer window.
- A `while true do` loop is used to make an action repeat forever.
- The `wait()` function is essential for pausing the script inside a loop to prevent crashing.
- `script.Parent` is a command that refers to the object the script is located inside.
Related Reading
- Creating and Selling Game Passes in Roblox Studio
- How to Spot and Avoid Robux Scams
- Understanding Roblox Premium Payouts: How Your Game Can Earn Robux