
Are you training hard but not seeing the results you want? The problem might not be your effort, but your intensity. Pushing to your limit in every workout can lead to burnout and plateaus. The secret to consistent improvement lies in training smarter, and the most accessible way to do that is with heart rate zone training.
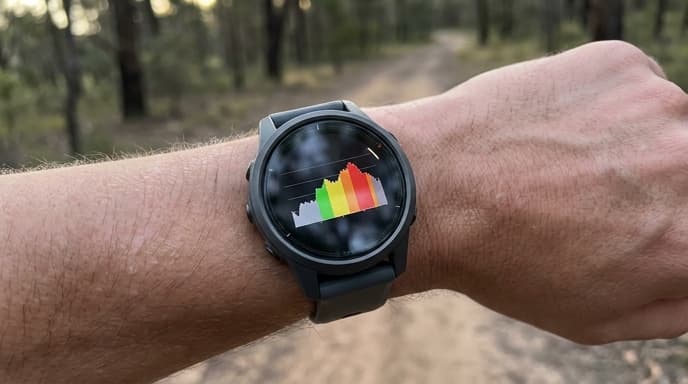
By monitoring your heart rate, you can ensure each workout has a specific purpose, whether it's building a solid endurance base, pushing your speed, or actively recovering. This guide will break down the what, why, and how of heart rate zones so you can take control of your training.
What Are Heart Rate Zones? The 5-Zone Model Explained
Heart rate zones are ranges based on a percentage of your maximum heart rate (MHR). Training within a specific zone elicits a particular physiological response from your body. The most common system uses five zones, each with a distinct benefit.
- Zone 1 (50-60% of MHR): Very light activity. This is your recovery zone, helping your body heal and adapt after harder efforts.
- Zone 2 (60-70% of MHR): Light activity. This is the foundation of endurance. Training here improves your body's ability to use fat for fuel and builds your aerobic base.
- Zone 3 (70-80% of MHR): Moderate activity. This zone improves cardiovascular fitness and begins to build lactate resistance. It feels like a comfortably hard effort.
- Zone 4 (80-90% of MHR): Hard activity. This is your lactate threshold zone. Training here improves your ability to sustain a hard effort for longer.
- Zone 5 (90-100% of MHR): Maximum effort. These are short, all-out intervals that improve power and top-end speed.
How to Estimate Your Max Heart Rate and Calculate Your Zones
The gold standard for finding your MHR is a lab test, but you can get a solid estimate with simple formulas. The most well-known is 220 - your age. While a decent starting point, it can be inaccurate for many people.
A slightly more revised formula is the Tanaka formula: 208 - (0.7 x age). For a 30-year-old, this would be 208 - (0.7 x 30) = 187 beats per minute (BPM).
Once you have your estimated MHR, you can calculate your zones. Using the MHR of 187:
- Zone 1: 94-112 BPM (187 x 0.5 to 187 x 0.6)
- Zone 2: 112-131 BPM
- Zone 3: 131-150 BPM
- Zone 4: 150-168 BPM
- Zone 5: 168-187 BPM
Remember, these are estimates. Pay attention to how you feel. Your Rate of Perceived Exertion (RPE) is a powerful tool. Zone 2 should feel easy enough to hold a conversation, while in Zone 4, you can only manage a few words at a time.
Zone 1-2: Building Your Aerobic Base
This is where most of your training time should be spent, especially if you're an endurance athlete. Zone 2 training builds mitochondria, improves fat oxidization, and creates a strong foundation upon which all higher-intensity fitness is built. These are your long, slow runs, rides, or swims.
Zone 3-4: Improving Lactate Threshold (Tempo and Stamina)
This is the 'comfortably hard' zone. Training here pushes your lactate threshold—the point at which your body produces lactate faster than it can clear it. Raising this threshold allows you to hold a faster pace for longer. These are your tempo runs or sustained interval efforts.
Zone 5: Boosting Max Performance
This is your all-out, maximum intensity work. Think short sprints or high-intensity interval training (HIIT). You can only spend very short periods in this zone, but it's incredibly effective for improving your VO2 max and top-end speed.
Frequently Asked Questions
Is the 220-age formula for max heart rate accurate?
It's a common starting point but has a large margin of error. It doesn't account for individual fitness levels, genetics, or other factors. Use it as a rough guide, but listen to your body and adjust based on your perceived exertion.
Do I need a chest strap monitor for accurate readings?
For high-intensity training and intervals, a chest strap is generally more accurate and responsive than a wrist-based optical sensor. For steady-state training in lower zones (like Zone 2), a wrist-based monitor is often sufficient.
How should I structure a workout using zones?
A balanced training plan includes work in multiple zones. A common approach is the 80/20 rule: 80% of your training time is spent in low-intensity Zones 1-2, and 20% is spent in high-intensity Zones 3-5.
Key Takeaways
- Heart rate zone training tailors your workout intensity to specific fitness goals.
- The 5-zone model ranges from very light recovery (Zone 1) to maximum effort (Zone 5).
- Estimate your max heart rate using a formula like 208 - (0.7 x age) to calculate your zones.
- Spend the majority of your training time (around 80%) in the low-intensity Zones 1 and 2 to build a strong aerobic base.
- Use your Rate of Perceived Exertion (RPE) alongside your heart rate monitor to gauge your effort.
Related Reading
- Acute vs. Chronic Training Load: The Metric That Predicts Fitness and Burnout
- What Your Wearable’s Blood Oxygen (SpO2) Data Actually Means
- 3 Simple Drills to Improve Your Running Form and Efficiency