
That foam cylinder in the corner of your gym or living room can be one of your best allies in workout recovery—or it can be a source of frustration and pain. The difference lies in technique. Effective foam rolling isn't about rolling as fast and hard as you can; it's a deliberate practice to help reduce muscle tension and improve flexibility.
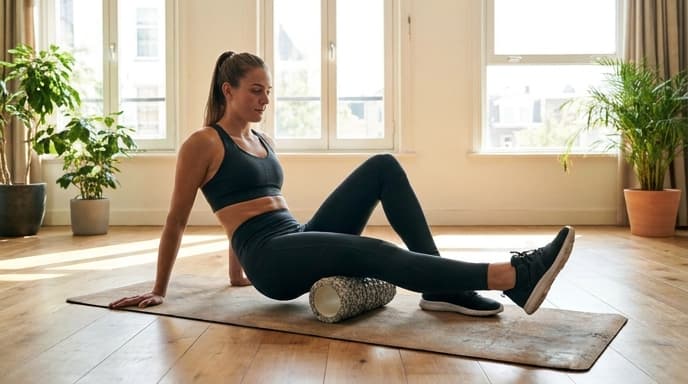
This guide will show you how to use a foam roller correctly to enhance your recovery, alleviate soreness, and improve your movement. We'll cover the right way to roll, the areas to focus on, and the crucial spots to avoid.
What Foam Rolling Actually Does (and Doesn't Do)
Foam rolling is a form of self-myofascial release. Think of it as a self-massage. The pressure from the roller can help ease tension and tightness in your muscles and the surrounding connective tissue (fascia). While it's often claimed to 'break up knots' or flush out lactic acid, the primary benefit is neurological. It helps calm down overactive muscles and improve your range of motion, which can reduce the sensation of soreness and prepare your body for movement.
The Basic Technique: Slow, Controlled Pressure
The key to effective foam rolling is to move slowly. Rushing through the movement won't give your nervous system enough time to respond. Follow this simple protocol:
- Position the roller under the target muscle group.
- Use your arms or other leg to support your body weight, controlling the amount of pressure.
- Slowly roll along the length of the muscle, moving at about one inch per second.
- When you find a spot that feels particularly tender (a 'trigger point'), pause and hold sustained pressure for 20-30 seconds, or until you feel the tension release.
- Continue rolling along the rest of the muscle. Spend 1-2 minutes on each major muscle group.
Key Areas to Roll: Quads, Hamstrings, and Upper Back
While you can roll many parts of your body, some areas tend to hold more tension from workouts and daily life. Focus your efforts here for the biggest impact.
- Quadriceps: Lie face down and place the roller under your thighs. Roll from the bottom of your hip to the top of your knee.
- Hamstrings: Sit with the roller under your thighs. Use your hands to support your weight and lift your hips. Roll from below your glutes to the back of your knee.
- Calves: Sit with the roller under your calves. You can cross one leg over the other to increase the pressure.
- Upper Back (Thoracic Spine): Lie on your back with the roller under your shoulder blades. Cross your arms over your chest to protract your scapula. Roll from your shoulders to the bottom of your rib cage.
Areas to Avoid: Your Lower Back and Joints
Knowing where not to roll is just as important. Applying direct pressure to certain areas can be ineffective or even harmful.
- Your Lower Back (Lumbar Spine): Your lumbar spine isn't supported by a large bone structure like your rib cage. Rolling it directly can cause your spinal muscles to seize up to protect it. Avoid this area entirely.
- Your Joints: The foam roller is for soft tissue. Rolling directly over your knees, ankles, or elbows puts pressure on ligaments and tendons, which can cause irritation.
- Your Iliotibial (IT) Band: While many people roll their IT band, it's a thick band of connective tissue, not a muscle. Aggressively rolling it can cause more inflammation. Instead, roll the muscles that connect to it, like your glutes and quads.
Frequently Asked Questions
Should I foam roll before or after a workout?
You can do both! A quick roll before a workout (30 seconds per muscle group) can be part of a dynamic warm-up to increase blood flow and improve range of motion. A longer, more deliberate session after a workout can help with recovery and reduce soreness.
Does foam rolling have to hurt?
You should expect some discomfort, especially on tight muscles, but it should not be excruciating pain. If it's too intense, reduce the amount of body weight you're putting on the roller. It should feel like a deep-tissue massage—uncomfortable but productive.
What kind of foam roller should I get?
For beginners, a standard, medium-density roller is a great start. High-density rollers with knobs and ridges offer more intense pressure but can be too much if you're just starting out. Start simple and progress if needed.
Key Takeaways
- Foam roll slowly, at about one inch per second, to allow your muscles to relax.
- When you find a tender spot, pause and hold pressure for 20-30 seconds.
- Focus on major muscle groups like the quads, hamstrings, calves, and upper back.
- Never roll directly on your lower back or over your joints like the knee or ankle.
- A short session can be used before a workout for activation, and a longer one after for recovery.
Related Reading
- Dynamic vs. Static Stretching: When and How to Use Each
- Readiness Scores Explained: The Science Behind Whoop and Oura’s Daily Numbers
- The 20-Minute Hotel Room Workout for Staying Strong on the Road